
Top Meter Face RemovedNext we had to remove the sliding meter face plate. On the right hand side, note the wire that runs from the under the meter plate and hooks loosely around a bolt. Gently bend that out of the way. Then left the two washers off and set aside. |

Click on image to see a larger version |
Face Panels OutNext, we removed the meter. I didn't photograph this bit but it's fairly easy. At about 4 o'clock and 8 o'clock you should see two hex-heads that will come out. Turn the meter over and remove the three little screws that hold the name plate, and this should let the bolts drop out. The meter assembly itself should be able to lift up and out. There's a wire that connects from the underside of this to the photocell, and it'll have to be cut somewhere. We cut it in the middle simply for convenience. |

Click on image to see a larger version |
Meter DetailTwo images of the meter unit itself (clamped in a little vise): the magnet, the armature and the needle. The top photo is the front of the meter, as you looked at it during disassembly. The bottom photo is the back of the meter. We gently held the holding-bar back so the pointer could swing freely. We used a multimeter set on its lowest Ohms setting, placed the negative lead on the magnet (ground) and touched the positive lead on the wire. The needle jumped. That meant the meter itself worked properly. It just wasn't getting power from the photo cell. |
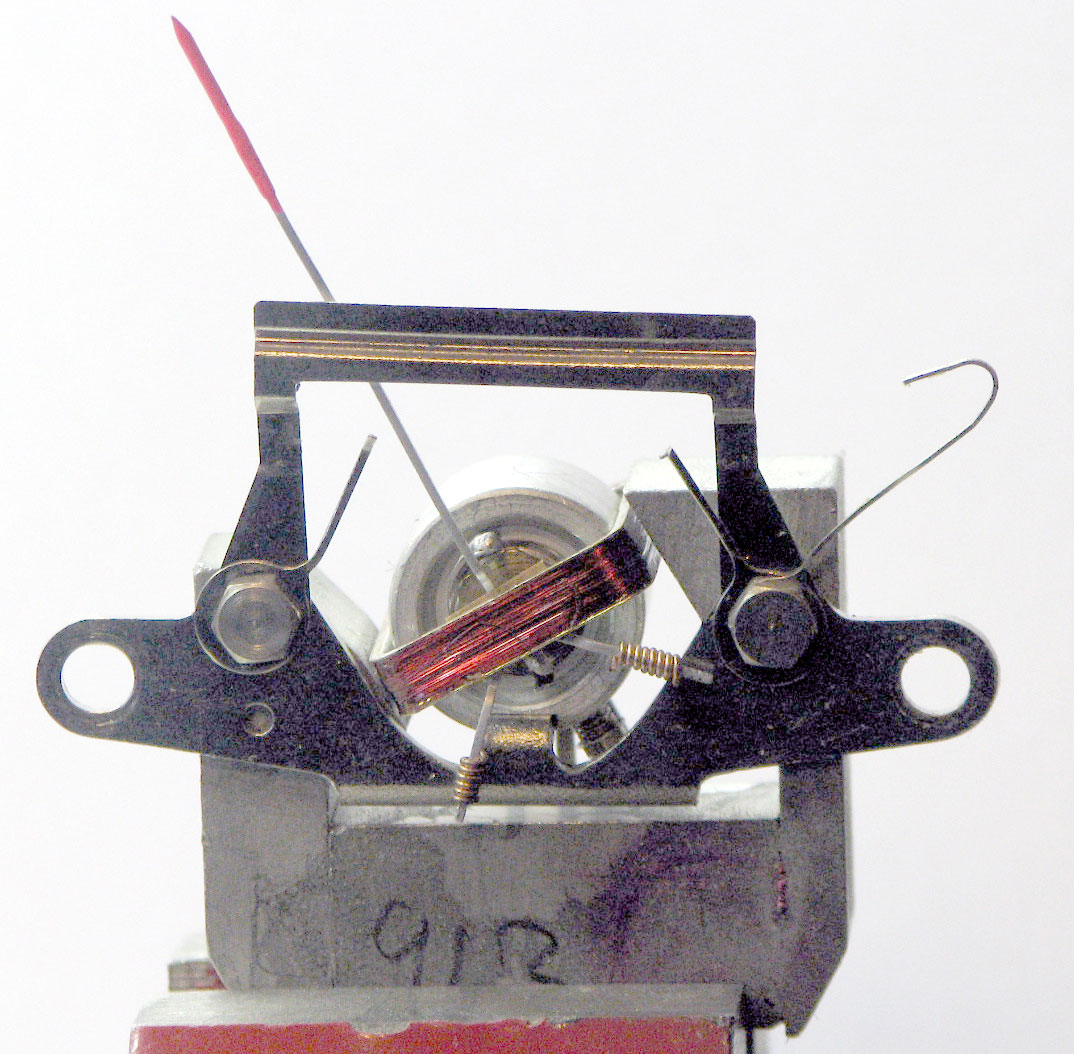
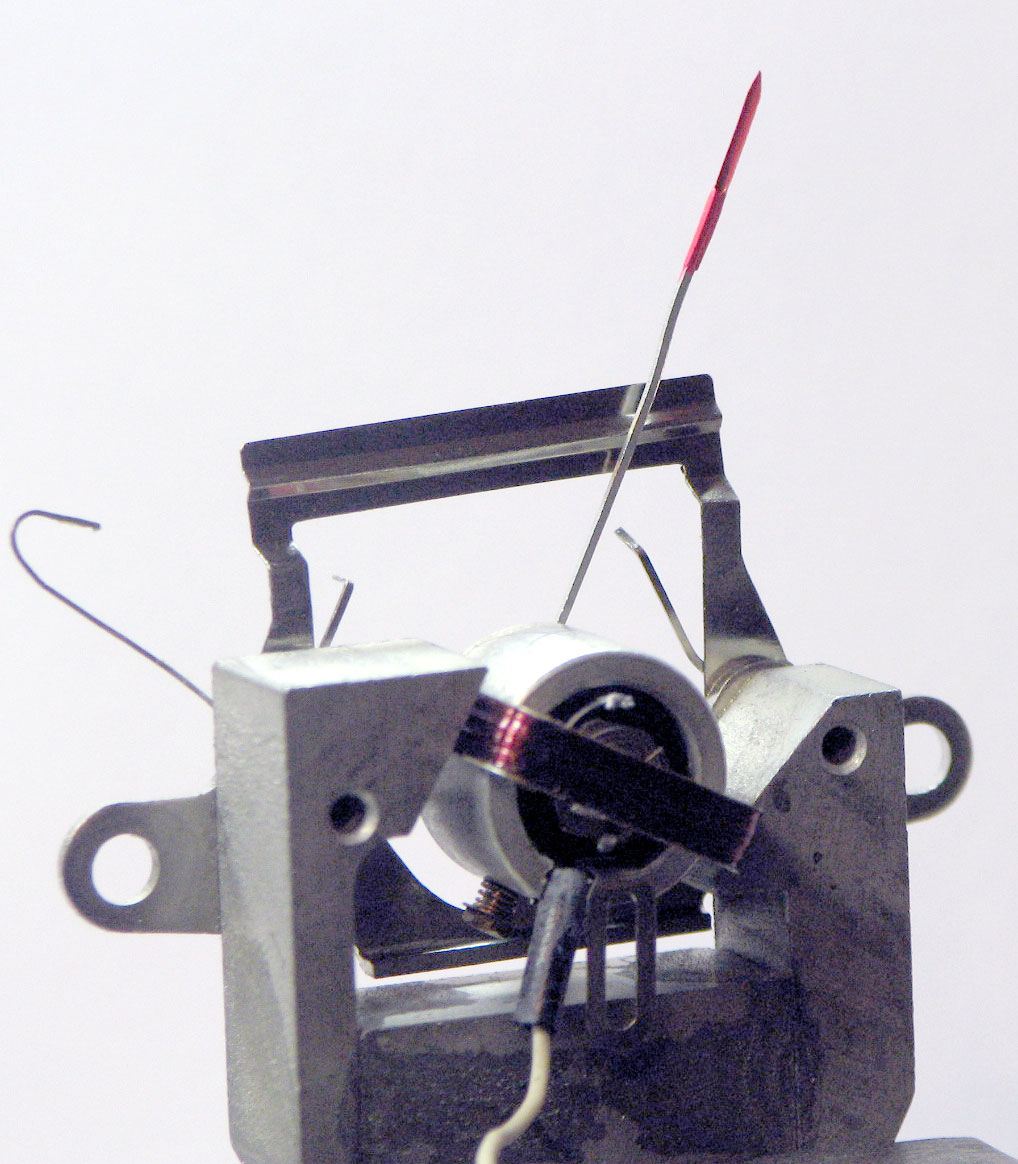
Click on image to see a larger version |
| Previous | Main | Next |