
Introduction
 The Charles Beseler company began in 1868 making scientific and lab equipment, and began producing enlargers in 1953. Beseler is one of the two dominant manufacturers in the USA. Their enlargers (along with Omega) were frequently found in schools and rental labs; a great many students learned how to print on a Beseler enlarger. While not the least expensive, they are typically rugged, no-nonsense machines that are built to last.
Beseler has a naming scheme for most of their enlargers which describes the features of the machine. E.g. a 45MXC is a 4x5 enlarger chassis with a motorized colorhead and extra support truss.
- Two-digit number — the max size of the negative it can accept (e.g. 23 is 2cm x 3cm, 66 is 6cm x 6cm, 45 is 4x5 inches, etc.)
- M — electric motor to raise and lower the lamphouse
- C — Beseler colorhead (filter drawer type)
- R — Resistrol unit (variable voltage regulator)
- X — Rear support truss (extra reinforcement)
- AF — Automatic focus
- B — Beslite (flourescent cold-light head)
- AG — Beseler-Agra colorhead (continuously variable filter type)
I have a few of Instruction Manuals and brochures available for download. 
Quick Comparison
| Model | Mfg | Col. Type | Col. Height | Head | Focus Method | Baseboard | Price | Notes |
|---|---|---|---|---|---|---|---|---|
| 67C | 1970s | Modern Photography Test February 1977 | ||||||
| 67CP | 1981 | Condener with filter drawer. Dichro optional. | 14 x 18-¼" | Condenser: $225; Dichro $417 | Compact model; optional left or right-hand controls. | |||
| 67CS | 1981 | Condener with filter drawer. Dichro optional. | 18 x 23-3/4" | Condenser: $313; Dichro $475 | XL model has larger baseboard and 18x max magnification; dual focussing knobs; modular deisgn; colorhead has built-in power supply -- Review in Darkroom Magazine, Oct 1981 (Vol 3 #6) | |||
| Printmaker 67 | Current | Single column | 39-½" | Interchanglable: condenser, variable-contrast, and dichroic color | Manual | 14 x 19" | Larger sister of the Printmaker 35, with which it shares interchangable heads. |
Series Comments
The 67 series was Beseler's entry into the 6x7cm format. I never really understood why anyone wanted a 67 when you could get the 23 series instead, but the article below (the review of the 67CS) makes an interesting case for it.
Model Comments
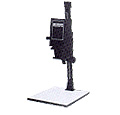
67CS
The following is an unsigned product review from the late, great Modern Photography magazine, February 1977. Following it is a review of the Beseler 67 Dichro head, also from Modern, November 1977. I've edited them a little for brevity.
Specifications: Beseler 67C enlarger, all negative sizes to 6 x 7cm. (2¼" x 2 3/4"), hinged spring-loaded glassless negative carriers, 23 x 16 1/2" baseboard, 40 in. inclined upright, accessory condenser for 35mm, 75-watt PH IIIa lamp. Other Features: Red filter, switch in line cord. Price: $209.95.
As time goes on, designs for enlargers become increasingly better. The practical effect is the consumer gets more for his dollar. There is a mass movement back to the darkroom in this country. This means that manufacturers can count on higher-volume sales and therefore, lower-per-unit production costs; the new Beseler 67C enlarger is a case in point. It is a lot of enlarger for a moderate sum of money. This becomes clearly evident even when the machine is examined casually.
When you do take a closer look, quality beneath the surface is apparent. The machine has a heavy look, is extremely rigid and has a good, solid feel to it. Castings are used in places where stampings would be expected. Mounted on the 16 x 23". baseboard is a rather elegant-inclined, upright column finished in matte black. This column is strengthened by stiffening fins on each side, with another pair at the rear.
The upright measures 40' high and, as magnification increases, the image moves forward on the baseboard, clearing the base for ease in printing large pictures. The head moves up and down on the upright smoothly by means of a twist-lock handle. Grab the handle on the right side of the head and twist it toward you to unlock the head. Position the head at the magnification you want and then twist it away from you to lock it tight. You will find it a very good design: fast, easy and positive.
Once the head is positioned you have a choice of focusing with your left or right hand by means of 2¼" knobs that are friction coupled to a heavy brass rod, which, in turn, drives the focusing unit. The 67C provides 5" of bellows extension, enough for reductions from a 35mm negative, and employs Beseler's excellent lensboard mounting system. You push-and-drop the lensboard to remove it and push-and-lift to install. It's fast and convenient. A red filter (which we question the value of) flips in and out of the light path; in fact, if you get a bit overenthusiastic using the filter, it may flip clear across the room. You see, there is no retaining lip on the front of the filter mount, so when you move it toward you, the filter goes it's own way. (We solved this problem by throwing it away.)
Pull down a massive lever on the left side of the enlarger head and the lamphouse is raised and locked. You can now remove the negative carrier. It's made of aluminum and spring loaded at the rear causing it to be open and ready for the negative as soon as it's removed from the enlarger. Locating pins center the film in the carrier. You will notice a second set of pins used to locate the carrier in the housing. It's fast, neat and accurate.
The lamphouse design follows that of the Omega B66 and the Durst CE 1000. Lifting a panel on the front of the lamphouse gives you total and easy access to everything inside--condensers, filter frame, heat absorbing glass and the lamp itself. A pair of 4" condensers are standard and are used for 2¼ square as well as 6 x 7cm formats. A third condenser is placed above the other two for doing 35mm work.
Now for some critical testing on the negative for alignment, illumination and temperature gradients. In any enlarger, overall sharpness is impossible unless the lens, negative and baseboard are parallel. We test parallelism by using a heavy bar with a spirit level that is hinged on one end, while the other end can be tilted by turning a setscrew. First the bar is placed on the baseboard and the bubble is centered. The bubble should stay centered when the bar is placed across the negative stage and lensmount. Our criterion is that ¼ bubble-length variation is acceptable; if it's more than that, we fail the enlarger. We often see alignments that are better than 1/2 bubble length but rarely does a machine come in at closer than 1/8 bubble length. The beseler 67C was so well aligned that the error was undecernible. Estimation puts the variation somewhere around 1/24 of a bubble length on all three planes. We have rarely seen a machine this well aligned simply because shipping can often affect enlarger alignment. How Beseler achieved this unusual result is a mystery, but we hope they engrave the formula in bronze and keep it safe.
We use a Lektra-PTM-7a Lux-meter to measure the light at the center of the field, and at the corners, to see how even the illumination is. We found that the center and the upper and lower left hand corners were virtually identical-within ¼ stop. At the right-hand corners light fell off to just under ½ stop.
The temperature rose swiftly and finally stabilized at 32°C (90°F). Since exposures were rather short in this fast machine, heat proved to be no problem. Using our standard negative on llfobrom #2 paper developed in Dektol 2:1 we found 12 sec. exposure at f/16 just about right.
With the head at the top of the upright, we found that a 12½ x 18½" print could be made from 35mm negatives without any problem. For anything bigger, the enlarger had to be reversed on the baseboard. This brings us to another point--the ingenious way in which the upright and the baseboard are joined. A large bolt is mounted in the baseboard with a washer to keep the bolt's head up a hair. The upright has a keyway which slips onto the bolt. Three screws are then tightened by hand and the enlarger is mounted. The 67C is the easiest machine to assemble that we have ever seen. Now, back to those big prints. You turn the enlarger around on its baseboard by removing the three screws (no tool necessary) and reverse the machine. Then replace the screws and it's done.
There are two more pluses for the Beseler 67C. We haven't made a big thing about the fact that the enlarger can accommodate negatives up to 6 x 7cm (Mamiya RB67 Pro-S makes that size negative.) Modern's Editors were uniformly impressed by the workmanship, careful design and execution of the Beseler 67C. We had guessed that it cost more than it did, and to us that means there's a lot of value there. It's a first class machine without a first class price tag--and that's hard to come by these days.
Dichro 67 Coloread
By using dichroic filters the Beseler 67 Colorhead is designed to extend the capability of the 67 enlarger to color printing. The Beseler 67 Colorhead consists of four parts: a housing that fits the enlarger chassis by means of two set screws; the mixing chamber; the lamp and filter assembly; and the power supply. Although the power supply is essential, it is sold as a separate item. To change from the condenser head to the colorhead, just loosen two setscrews at the rear of the condenser head and remove it. Replace the colorhead in the same position, tighten the setscrews and that's it--easy and fast. Now plug the head into the power supply, plug the power supply into a voltage regulator (which in turn gets plugged into a timer which is plugged into an outlet) and you are ready to go.
The Beseler 67 Colorhead is a really "up-front" design. The cyan, magenta and yellow filter controls, the dials and the white, light lever are all plainly visible and easy to use on the front plate of the head. Let's look inside the unit. We do that by simply lifting up on the front plate and the lamp and filter assembly comes away. What's left is the mixing chamber. This is simply lifted out. The mixing chamber used for our test covered the full 6x7 format. A 35mm chamber was not available, nor did Beseler announce any plans for making one available. That could be a problem; we'll discuss it later.
The mixing chamber is shaped like a small, slope-roofed house with a small window to allow light to enter. Except for the knobs and optical components, the lamp housing and filter assembly are made of heavy metal, with no evidence of plastic parts anywhere. Turn any color-control knob and a cam is actuated that moves a dichroic filter into the light path. The knobs and the indicating windows are color coded. The scale is marked from 0-200cc in units of 1 cc. The action is firm, tight, and positive, this gave us the feeling that there was absolutely no slippage in the linkage. This also means that you can repeat a setting with great accuracy--a comforting thought.
To the right of the face plate is a white-light lever, which, in the up position, gives you filtration. Flip it down and the filter system is moved out of the light path and you get white light for focusing and black-and-white printing. Here again the mechanical action was very positive--a sign of good design and workmanship.
Let's put it back together and make a few tests. Pull down the lever on the left of the colorhead and it lifts, allowing access to the negative carrier. We slipped in a Thermo-Slide here and did some temperature measurements to see how much heat would hit your negative during exposure. The temperature climbed rather rapidly during the first minute and a half of exposure. Room temperature was 68°F (20°C). At the end of a minute and a half the temperature had gone up seven degrees centigrade. That's a pretty fast climb, but nowhere near high enough to cause any negative damage.
Since almost all color heads interpose a mixing chamber between the light and the negative, there is a great deal of thermal insulation present, and almost no heat rise takes place. the temperature leveled off at 30°C after two and one-half min. Most color exposures run less than a minute (the upper end of color paper reciprocity effect). So why are we timing out to three minutes? Well get into that when we talk about the lack of a 35mm mixing chamber.
One troublesome note; when the head was set in place and carefully adjusted with the retaining screws well tightened, there was a bit more of a light leak than we cared for. It originated at the point where the colorhead meets the carrier, and it resulted in a faint sliver of light around the darkroom at carrier height. It wasn't enough to fog paper, but was somewhat annoying.
Now let's measure evenness of illumination. We'll do it two ways: first, with a 50mm lens and 35mm carrier in place; then with a 105mm lens and a 6 x 7 carrier in place. Results with the 35mm setup were first class. The difference corner to corner was undetectable by our Lektra PTM-7a photometer. The difference from edges to center was somewhere around 1/10 stop--impressive. The same test repeated for 6 x 7 indicated that results dropped from "impressive" to only "excellent." Once again there was no discernible difference from corner-to-corner illumination, but the center-to-corner difference was 1/5 stop--still a fine performance.
When we made prints from 6 x 7 (or 6 x 6) negatives, the Beseler 67 Colorhead was pretty fast. Using our standard Kodak Ektacolor negative, and printing on Ektacolor paper 37 RC we made 8 x 10 prints using a filtration of 80Y and 65M at an aperture of f/8 in just 25 sec. That's a nice comfortable exposure time, well clear of reciprocity problems. But when we switched to a 35mm negative and a 50mm lens, exposures increased dramatically. In fact, the exposure difference was about 2 1/2 between comparing the two formats at the same f/stop, for the same size print, from the same negative, we found exposure times of 65 sec. for the 35mm, as compared with 25 seconds for the 6x7. Or, in a neutral test, a ratio of exactly 7:19. This is easily accounted for when you consider that the broad spread of light for the 6x7 will naturally cause a drop in intensity on the smaller 35mm area where greater light concentration is needed. And the solution is equally simple--providing a 35mm mixing chamber. We hope Beseler will do this in the near future. From both an operating and an image-quality standpoint, the Beseler 67 enlarger and Colorhead were a delight to work with.
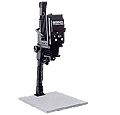
67CS
.jpg) The following is a product review from the now-defunct Darkroom Magazine, Vol 3 #6 (October 1981). It was written by Norman J. Tennefoss. I've edited it a bit for brevity.
The following is a product review from the now-defunct Darkroom Magazine, Vol 3 #6 (October 1981). It was written by Norman J. Tennefoss. I've edited it a bit for brevity.
For those of you already familiar with the Beseler line of enlargers, the 67CS can be described quite easily: it's really just the head assembly from the 67C monocolumn enlarger (which has been discontinued), bolted to the ladder-frame chassis of the 23C. As such, the enlarger uses all of the negative carriers, lensboards and accessories which have complemented preceding 67 models, including the Dichro 67S colorhead. We tested the "standard" version of the 67CS; an XL model, featuring greater on-baseboard magnification capability, is also available.
Simple Solutions
The Beseler 67CS enlarger is an exercise in simplicity of design, assembly, and operation. By replacing the 23C head with that of the 67C, Beseler has done several things. Firstly, the readily indentifiable ladder-frame chassis construction, a Beseler trademark, has been preserved; stability, therefore, has been assured. Next, the size of the medium format negative has been redefined; the nearly defunct 2-¼ x 3-¼" (6x9cm) format is replaced by the 2-¼x2-¾" (6x7cm) format used in currently produced cameras. This change in film-format fashion had already been reflected several years ago when Beseler introduced the 67C model; it was a logical step to use the existing 6x7 head to modify the 23C.
Another thing that combining two existing designs has accomplished is the simplification of the enlarging head's construction. The 23C head has more moving parts, two bellows, larger (more expensive) condensers and negative carriers, and a more expensive colorhead. The 67C heads, both black-and-white and color, are much less complex and therefore less expensive. At a time when products must sometimes be compromised to keep costs as low as possible, the 67CS is one compromise that works.
In use the 67CS is, again, simple and straightforward. Elevation of the carriage is accomplished by untightening the "T-handle" elevation lock, and cranking the handle on the right side of the chassis. Plastic gears in both sides of the carriage engage toothed racks on the frame. The carriage won't fall if you let go of the crank since a counterbalance spring is incorporated in the elevation assembly.
A handle on the left side of the enlarger lifts the head when pressed to the up position. The action is smooth and positive. Two heavy springs maintain the elevated position or clamp the negative carrier firmly in place—so firmly that, even though the negative carriers have tabs on them to allow rapid negative shifting, you'd better have strong fingers to resist the springs.
Focusing is accomplished by either of the left and right side knobs. Tension on the focusing assembly is adjustable should it be too loose or too tight. The lens and negative stages are pre-aligned at the factory, but this entire assembly may be easily aligned to the baseboard by means of four screws in the negative stage and a level or carpenter's square.
There are several things that the Beseler 67CS cannot do that the 23C can. The 67CS has no provision for distortion control; in other words, no swinging lensboard or tilting negative stage. Neither can the 67CS be used for wall projection since the head won't tilt backwards as on the 23C. These points are relatively minor for most workers and in fact can be considered an advantage on the logic that "if you aren't going to use it, why pay for it?"
One other thing beyond the ability of the 67CS concerns the colorhead. While the colorhead for the 23C en-larger is a Dual Dichro unit, meaning that it can be used as either a condenser or a diffusion colorhead, the Dichro 67S colorhead for the 67CS is a diffusion-only design. Again, for most printers this won't be a problem since most color printing is done with the softer diffuse illumination. The person wanting contrastier light can print color with the condenser lamphouse and an accessory set of color printing filters.
The 67CS colorhead is compact and completely self-contained, but lacks a voltage stabilizer. This highly desirable item is, however, available as an accessory from Beseler. The three filtration control knobs are clustered on the front of the lamphouse and a white light lever for removing the filtration from the light path is located on the right side. This lever on my sample was extremely tight to operate. I think this was a quirk of my particular unit, but you might want to check this out before you buy.
The Beseler Dichro 67S comes with two light-mixing chambers: one for 6x7cm and one for 35mm negatives. Changing the chambers, as well as the quartz halogen lamp, is a simple matter of sliding up the entire front portion of the head. While this head is not extraordinary, it is solid and well designed, and a perfect companion to the 67CS enlarger.
Generally, I found the Beseler 67CS to be a solid, workable enlarger. While there are certain limits to its abilities, most darkroom enthusiasts will find nothing lacking that they require.
Printmaker 67
The Printmaker series comes in two sizes, the 35mm version and this 67 version, which can handle 6x7cm images. It has three optional, interchangable heads: a stadard candenser head, a Variable-Contrast head, and a dichroic color head. Letter combinations after 67 designate the kind of head, and XL refers to an optional extended-length column (e.g. the 67XLC is the extended length, condenser-head version).