
![]()
Purchased this for three reasons, none of them particularly shrewd. First off, Hoffman was based in Los Angeles, and I thought it would be nice to have something by local boys. There are a few others, but most radio companies I know of came from the Midwest, particularly Chicago, or New York.
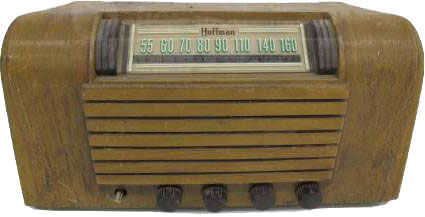 Second, Hoffman appears to have made some very good stuff. Even though they peddled their share of All American Fives, they also made some quality stuff. One of their earliest was an A300, made around 1946 or 47. That model has three knobs: on-off/volume, tuning and a tone control. You don't see the tone control on many radios because it cost a little more.
Lastly, this particular model is not an A300; it's some variant I haven't yet identified. It's got 5 knobs, not three, even though the cabinet appears identical. I've been scouring the internet but so far I haven't found another like it.
This guy showed up on an auction website; I'd bid and lost. I'd kicked myself mildly for missing it, but oh well. I guess the bidder never paid, because a month later it was relisted. This time I made sure to get it. Won it for $16 plus s/h (another $15), which I figure is worth it.
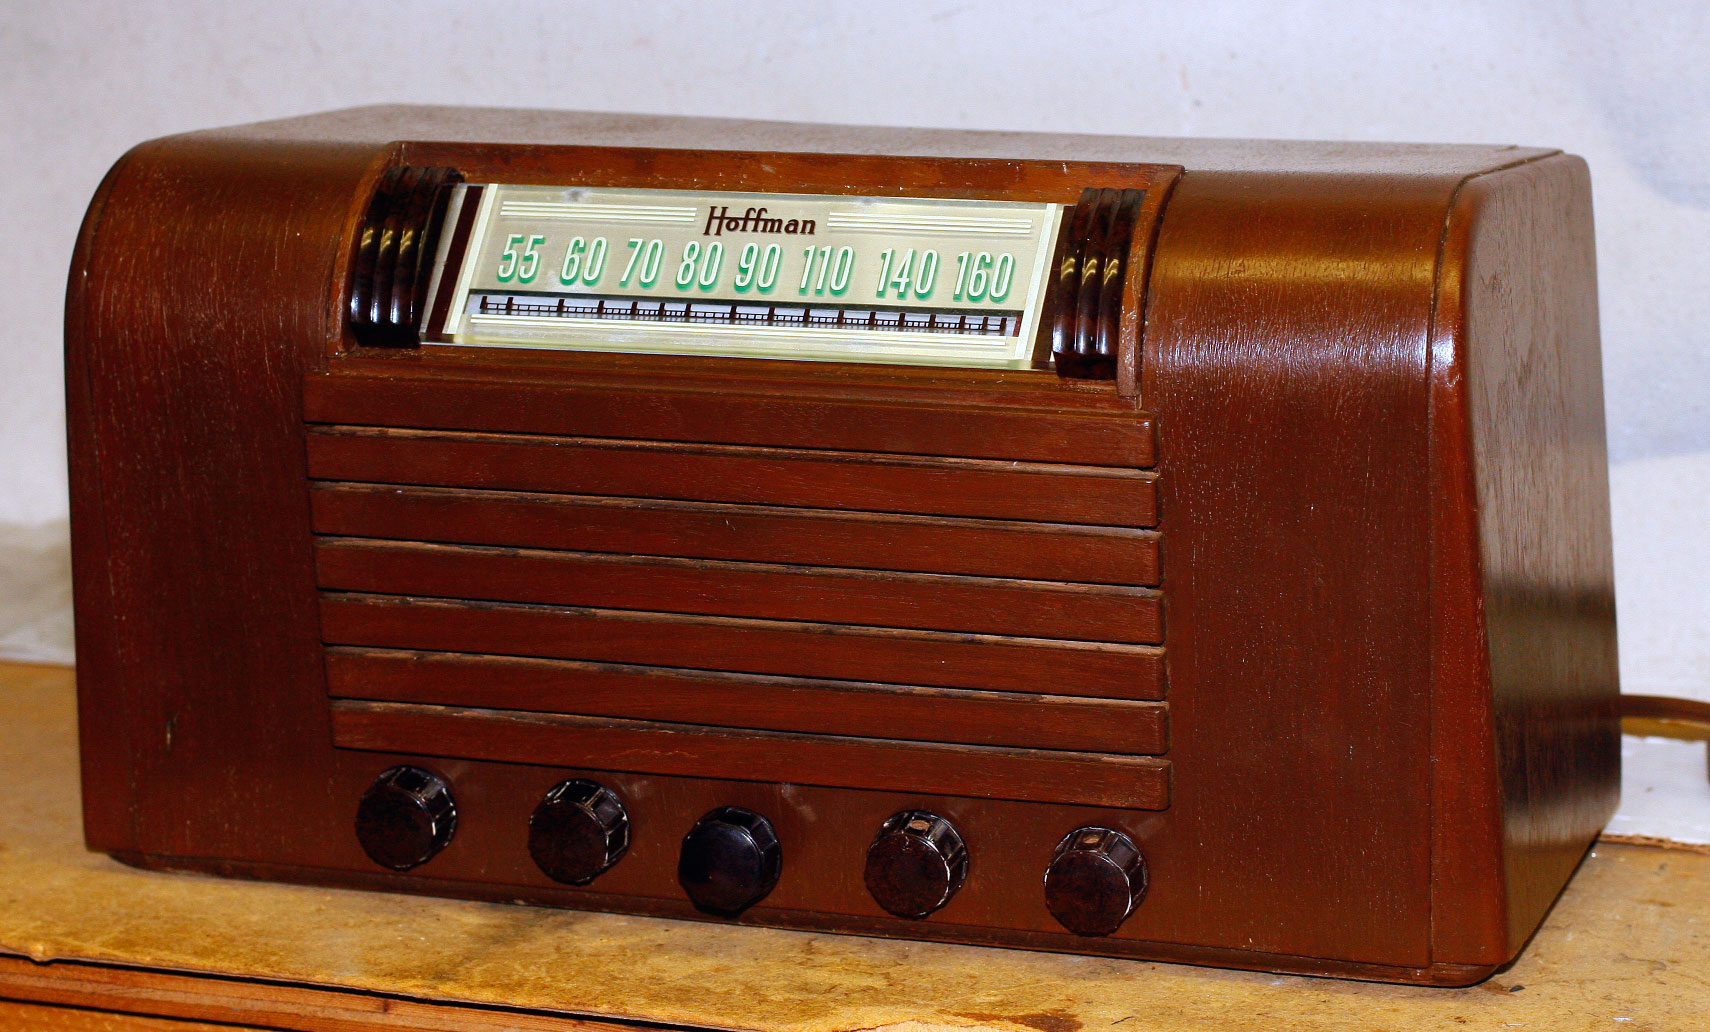
 So—it arrived. Still can't figure out what model it is. Cosmetically, it's identical to an A300 except it's got five knobs instead of three. They are, from left to right (as in the photo above), Volume, Radio/Phono (there's a phono input in the chassis rear), On/Off, Tone and Tuning.
My guess is that it's a deluxe version that cost a little more, but for whatever reason it's not listed in the radio price books that I've seen so far.
 The chassis came out nicely; filthy but complete. All the tubes tested okay. A lot of the dirt (like on the dial card) blew off. The dial cord was intact but loose; a little rosin and some scoring of the tuner shaft helped, and brushed a little fingernail polish to cover chipped paint on the pointer.
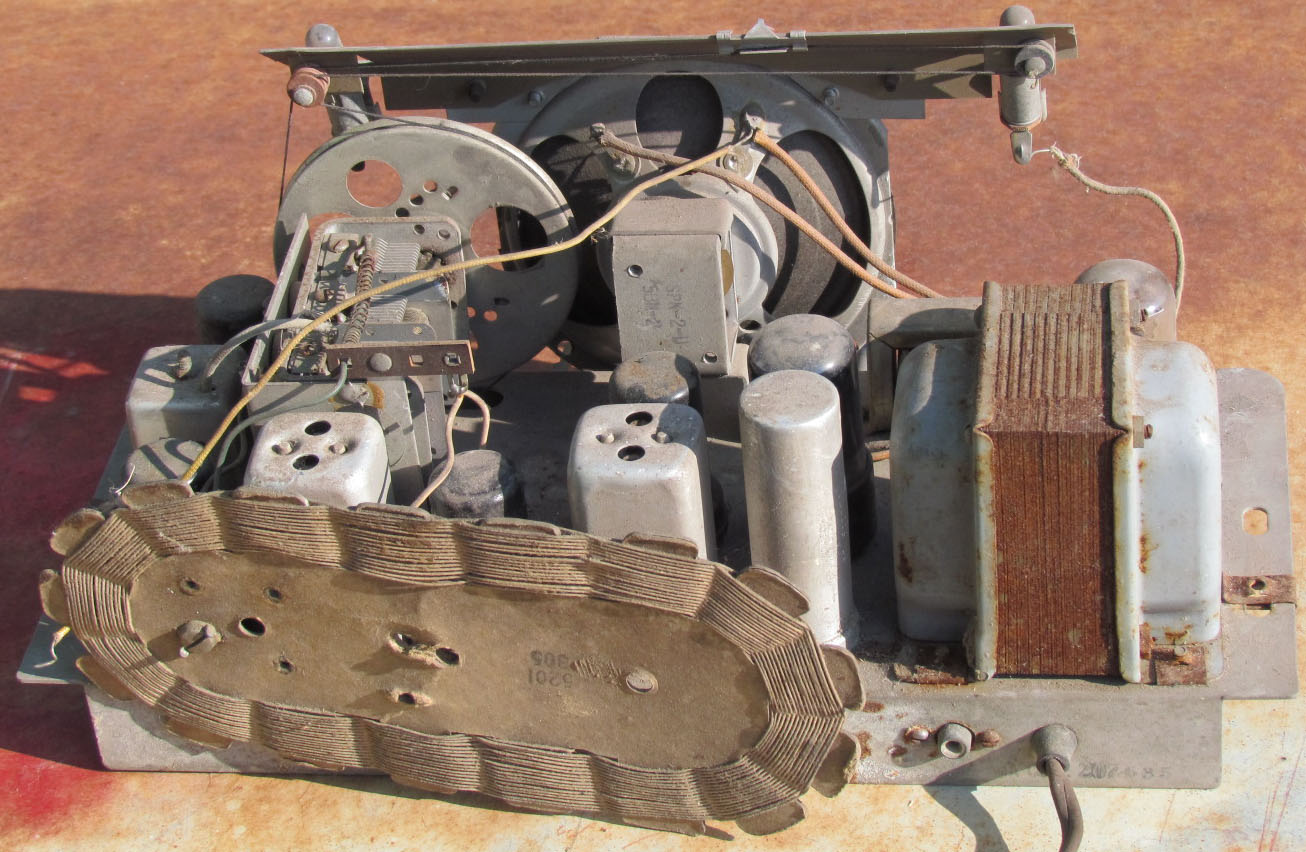
Here's a view of the rear unit. The loop antenna card had been torn off the bracket it mounts on, but was thankfully complete. Just had to run a screw and a good-size washer to refit it. And blow off a lot of dirt and dust. Also replaced the very ratty A/C line cord with broken plug end.
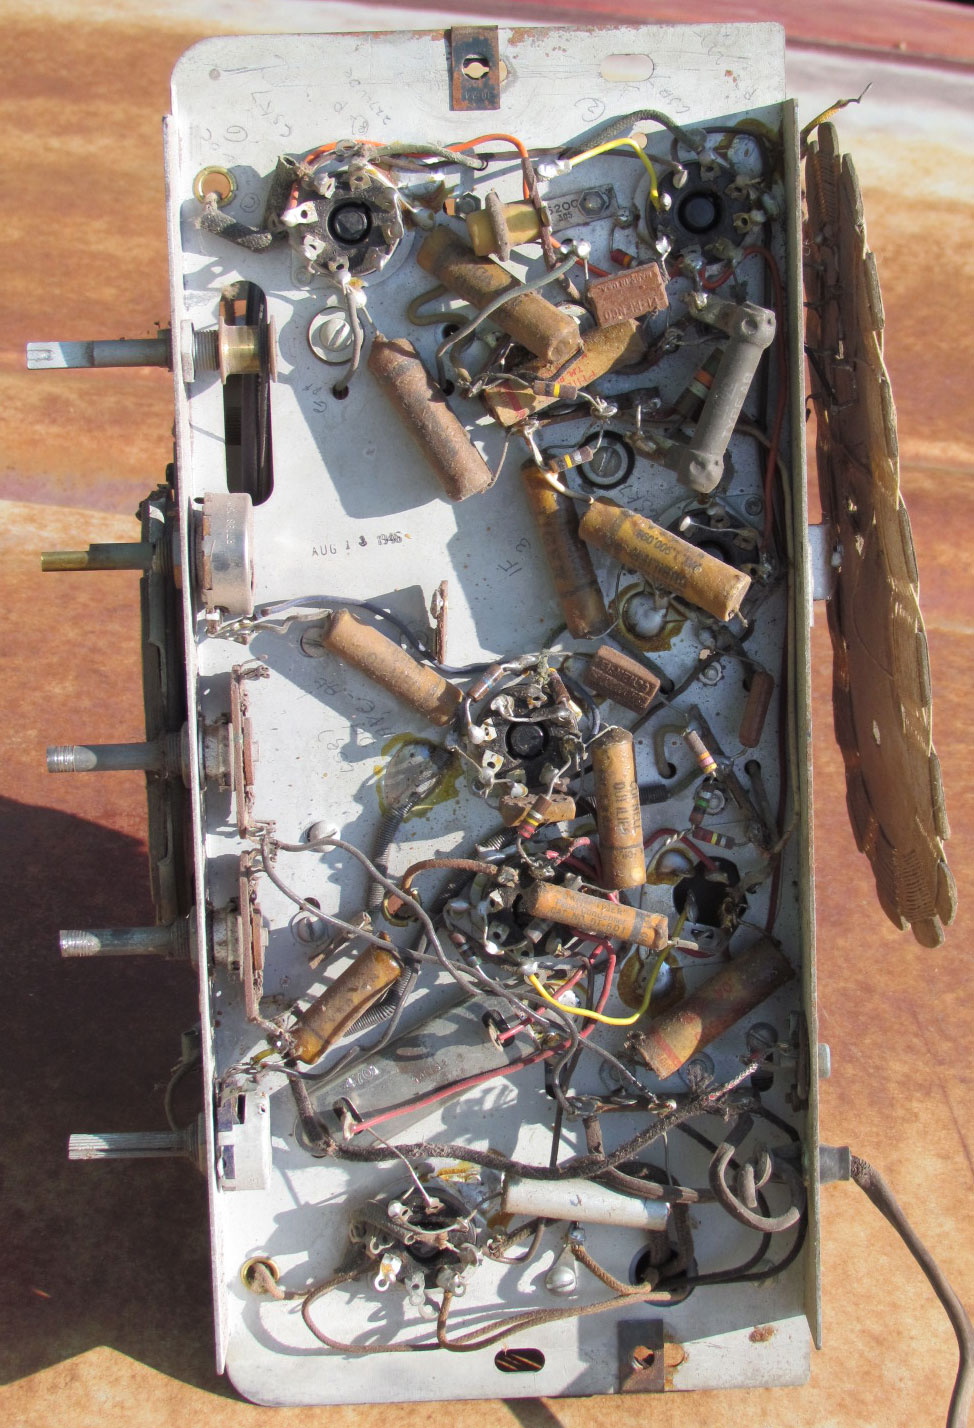 The underside of the chassis. Replaced the filter cap, which was (of course) bad, and a couple of the nearby ancient caps that were near it, and that brought it back to life nicely. Alignment went fairly quick and easily, and it's a player.
As I said above, this is almost an A300 but not quite. The service docs are a little off. A previous owner had gone to the trouble to penciling in the location of various components onto the chassis bottom. There's also a date stamp, Aug 13, 1946, which is pretty plain to see. On this photo (click on it for a larger version) it's on a bare piece of sheet metal, just to the left of the tone pot (2nd control down from top). I assume that the factory did that; the A300's a 1946 model and it would make sense.
Tube Compliment
6SK7 - RF amp
6SA7 - Converter
6SK7 - IF
6SQ7 - 2nd detector/AVC
6K6 - Audio out
6X5 - rectifier
Cabinet
So much for the mechanicals. The cabinet's another matter. Again, it's filthy but complete. All the parts (that I expected) are there except for the cardboard back. The finish it shot. Woodworking has never been my strong suit so I've been researching and reading up. I found a couple of interesting articles at MAARC (Mid-Atlantic Antique Radio Club).
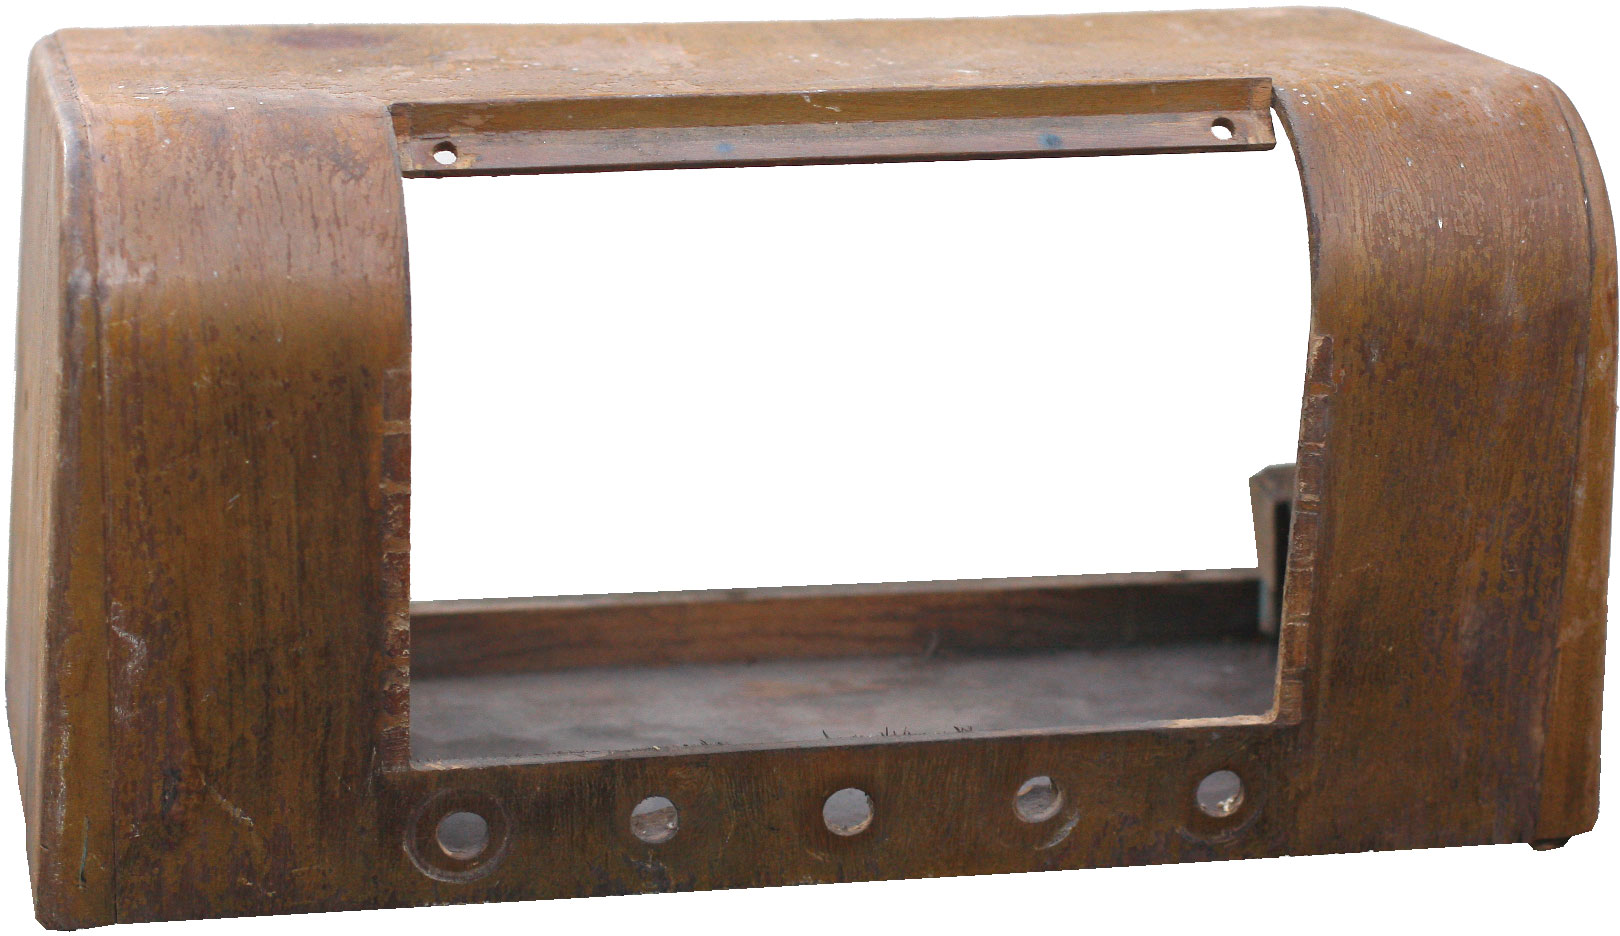 So here's my cabinet. Four nuts on the back and the whole front panel comes off. The pieces break down to a front grill, two (at one time) plastic pieces that frame the dial, two half-moon wood wafers that act as spacers on the outside of the black pieces (longer parts of the tab go inside), the wood mask for the dial, the dial glass itself, and a back panel. I haven't looked at the glass much other to make sure I didn't break it before the rest of the cabinet is done.
As you can see (click on it for the big one) the cabinet is rough, to say the least. The finish is flaking off and the grain is coarse. The only good thing I say about it is that the veneer is intact.
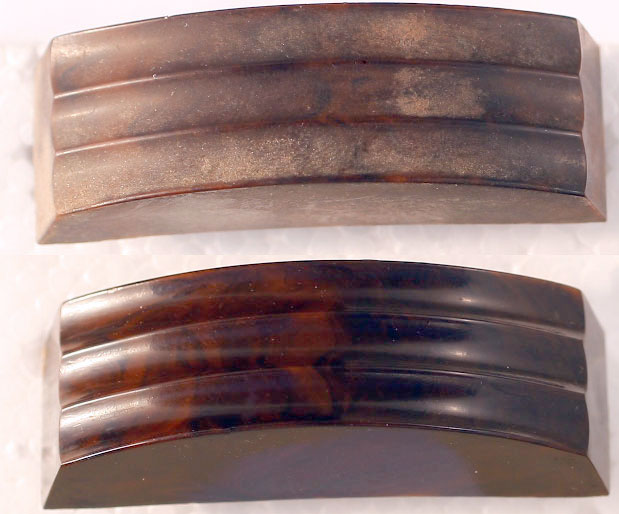
Here are the plastic endcaps. They provide the studs that nuts will screw on inside, and that holds the dial glass and the whole front grill assembly in place. At first I thought they were grimy black, then I thought they were muddy brown. I cleaned one up and realized it's a very pretty marbleized mahogany color (click the photo for a larger view). The one on top is before cleaning, the one below is after. Cleaning was a matter of using 409 to get the dirt off, then a little Ultra bright toothpaste to polish the plastic a bit, and finally a dab of car wax to protect it. The rest of the cabinet may end up terrible, but these will look great.
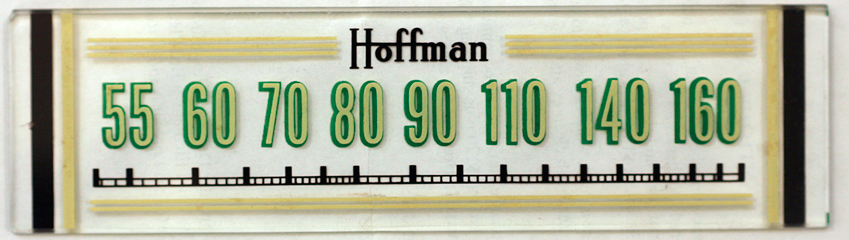 This is the dial glass, before I break it. Not a great photo but the best I can do right now. It had some light crud but cleaned up nicely. I once had an old Webcor reel recorder and I decided to clean it up a bit; I don't remember what I used, might have been rubbing alcohol, but I wiped the Webor logo paint right off, in one stroke, as clean as you'd ever want—if you wanted, which I did not. Ever since then I've lived in mortal fear of accidentally taking the paint off these things, but the glass cleaner I used didn't bother it.
The backing plate is a thin piece of aluminum or tin with a horizontal strip cut out, which would appear right behind that black hash-marked rule on the bottom of the glass. That allows you to see the pointer and lumination from the bulb. Mine's got some ground-in dirt or scorch marks that so far don't want to come out. I may paint it with "bare metal" paint if I can't find something non-abrasive that will take it off.
 Unfortunately I neglected to take photos of the cabinet while I was working on it. There was a nasty black burn spot on the top left side that's almost visible in the before photos above (I think a hot light bulb fell over and scorched it), plus lots of scratches and the rest. I downloaded an e-book on cabinet refinishing and decided to give it a try. I used lacquer thinner and 0000 steel wool which ended up taking the finish off as well as the color. The bare cabinet is actually several several different pieces of wood, none of which matched much at all. The good part was that the black spot mostly went away.
I bought a can of spray toner-lacquer from a specialty woodwork shop and sprayed it on. Toner is a combination lacquer and stain, and it goes on darker with every coat, so you have some control over the tone by how much you put on, and it covers the base wood. In my case I wanted the base covered completely so that all the wood appeared to be the same. I think the result is darker than the original but not unreasonable; I like the color so that's all that really matters.
Things went sideways again when I decided to finish it off with a little wood furniture polish to protect it. I think the problem is that I should have put on a sanding-sealer first, then toner-lacquer. Because what happened is the wax is in the grain and doesn't buff out properly, so now I've got these flecks of yellow wax that look like dust or fine particles in the finish. So I think I'll have to clean the wax off it at the least. Maybe if I get adventurous I'll take the lacquer off again and try again, but the wood veneer is already thin and I'm paranoid of sanding through it. So maybe not.
All in all, I'm mildly pleased with how it turned out.
Current status: this radio is no longer in my collection. This page will be removed in late 2024.