
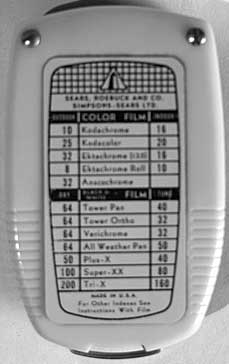
BaselineThis is the unit before we begin. Hopefully it's what we'll get when we're done. The needle is stuck and the meter glass is loose. It's not floating around inside the meter per se, but it's shifting back and forth and that's not good. On the back there are two exposed screws. They'll have to come out. The film speed label is a stiff card that was glued on with contact cement. With some gentle persuation, it lifts off and exposes two more screws (lower), which easily come out. There are are also two capped screws (upper), which hold the meter movement itself in the back cover. Those should be left alone. |
  |
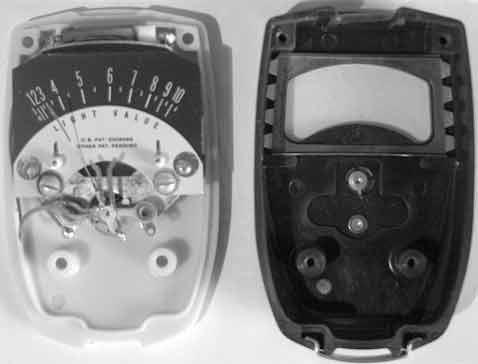
Cover RemovedThe front cover lifts off cleanly, and here they are side by side. |
 |
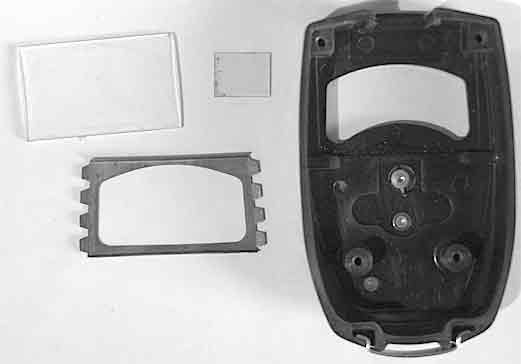
Front Cover DisassembledThere's a brass retainer plate that holds the meter glass in; it's sloppy and it's letting the glass rattle. Someone probably put this thumb on the glass and pushed it. It didn't take much effort to bend the side teeth a little and lift the retainer out, then the glass came right out. I cleaned the glass and set it in the channel where it belongs. I gently pushed out the side teeth, dropped the retainer in and pushed it down so it securely fit against the glass. No more rattling. The little square window (upper center) covers the photocell at the top of the unit. There's no retainer; it sits in a channel that holds in place. I cleaned it and then set it in its proper place. If you're reasonably careful, it doesn't fall out when you marry the covers back up. |
 |
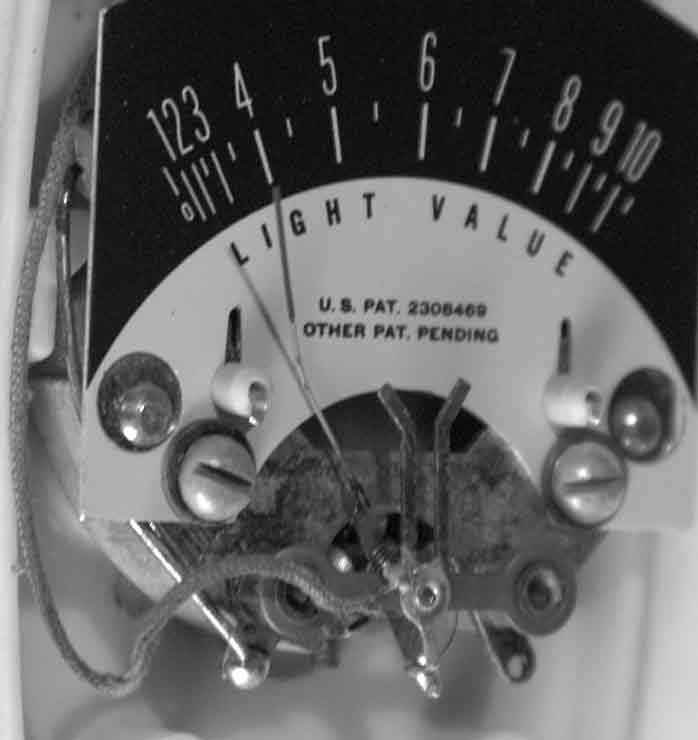
Meter AssemblyOnce the cover was off, the needle swung to life. It's actually very lively. The problem is that the needle is badly bent, and it was pressed up against the glass. You can kind of see it here, but click on the photo for a larger version and you see how badly bent it was. I gently straightened it with tweezers, and now the action is free. Not shown: simply the reverse of disassembly. I put the covers together, replaced the screws, dabbed some contact cement on the back and stuck the label back on. Voila! A working meter. |
 |