
This article originally appeared in the magazine Minicam Photography, September 1947. It's dated but much of the information is still useful, particularly when evaluating older enlargers. No author credit was given. — JO
SOONER OR LATER every dyed-in-the wool amateur photographer, given half a chance, decides to jilt the corner drugstore by buying an enlarger and setting up his own darkroom. This decision made, the question that plows the deepest furrows in the amateur's forehead is: "which enlarger shall I buy?"
With the idea of helping prospective buyers make a wise decision, Minicam asked all American enlarger manufacturers to cooperate by supplying photographs and data on their products. The results of the survey are compiled in this article, but before digging into the specifications of individual enlargers, there are several points that a buyer should consider carefully before he sets out on a shopping tour.
 The first factor, of course, is the price. Only you can decide what you need and can afford to pay for your enlarger. The word need is important. If you have a $10 camera, like to take snapshots, and want to putter with enlarging for the fun of it, don't buy a $100 enlarger. Buy something inexpensive. If you have a camera with a fine lens and must have top-quality pictures to be happy, buy an enlarger with qualities on a par with those of your camera. Never mate a good camera lens to a poor enlarging lens, or to an enlarger with an inferior illumination system. They'll have a mis-carriage.
The size of negative your camera produces is another factor to be considered in choosing an enlarger. There is a size of enlargers made to accomodate practically each size of negatives, and the two should be matched for convenience in printing. If you own several cameras which produce negatives of different sizes, you will save money by buying an enlarger to accomodate the largest negative size needed.
When the range of negative sizes is comparitively large, say from 35mm to to 4" x 5", to use only one enlarger will mean that two enlarging lenses will be necessary. If the enlarger is the condenser type (to be discussed specifically later), two sets of condensers will also have to be used since for each focal length enlarging lens there is an optimum condenser size. Condensers with a diameter of about 6/2 inches, for example, are recommended for 4" x 5" negatives, 5-inch condensers for 2 1/4"x3 1/4" negatives, and 3-inch condensers for 35mm negatives. These specific combinations, with the appropriate enlarging lens, must be used if absolutely even illumination is to be attained. An enlarger with a double set of condensers and lenses, however, will still be less expensive than two separate enlargers.
Illumination Systems
When photographers discuss enlarger illumination systems, one of the questions most frequently asked is "Which is best— condensing or diffusing illumination?"
Before we begin to gnaw on that problem, let's make sure we know the difference between these two popular types of illumination.

In enlarger design it is essential that provision be made for the entire negative to be evenly illuminated. The diffusion enlarger takes care of this by means of a piece of ground glass located just above the negative carrier. In some enlargers this glass is sand-blasted so that it is less translucent at the center than at the edges. The purpose of this is to insure even illumination. The light from the enlarging lamp striking the glass is diffused before it reaches the negative which accounts for the term "diffuse illumination." The so-called "cold-light" enlargers are also diffusion types; these will be discussed in a later paragraph.
Condenser enlargers, as the term implies, usually have two plano-convex condensing lenses that collect the light from the enlarging lamp and bring it to a focus in or near the enlarging lens. The condensers are placed with their curved sides facing each other as indicated in the accompanying diagram, and the negative is positioned as close as possible to the bottom condenser to help ensure even, over-all illumination. Generally, the focal length of the condensers is about equal to the focal length of the enlarging lens and the diameter of the condensers should be a little greater than the diagonal of the negative being enlarged.
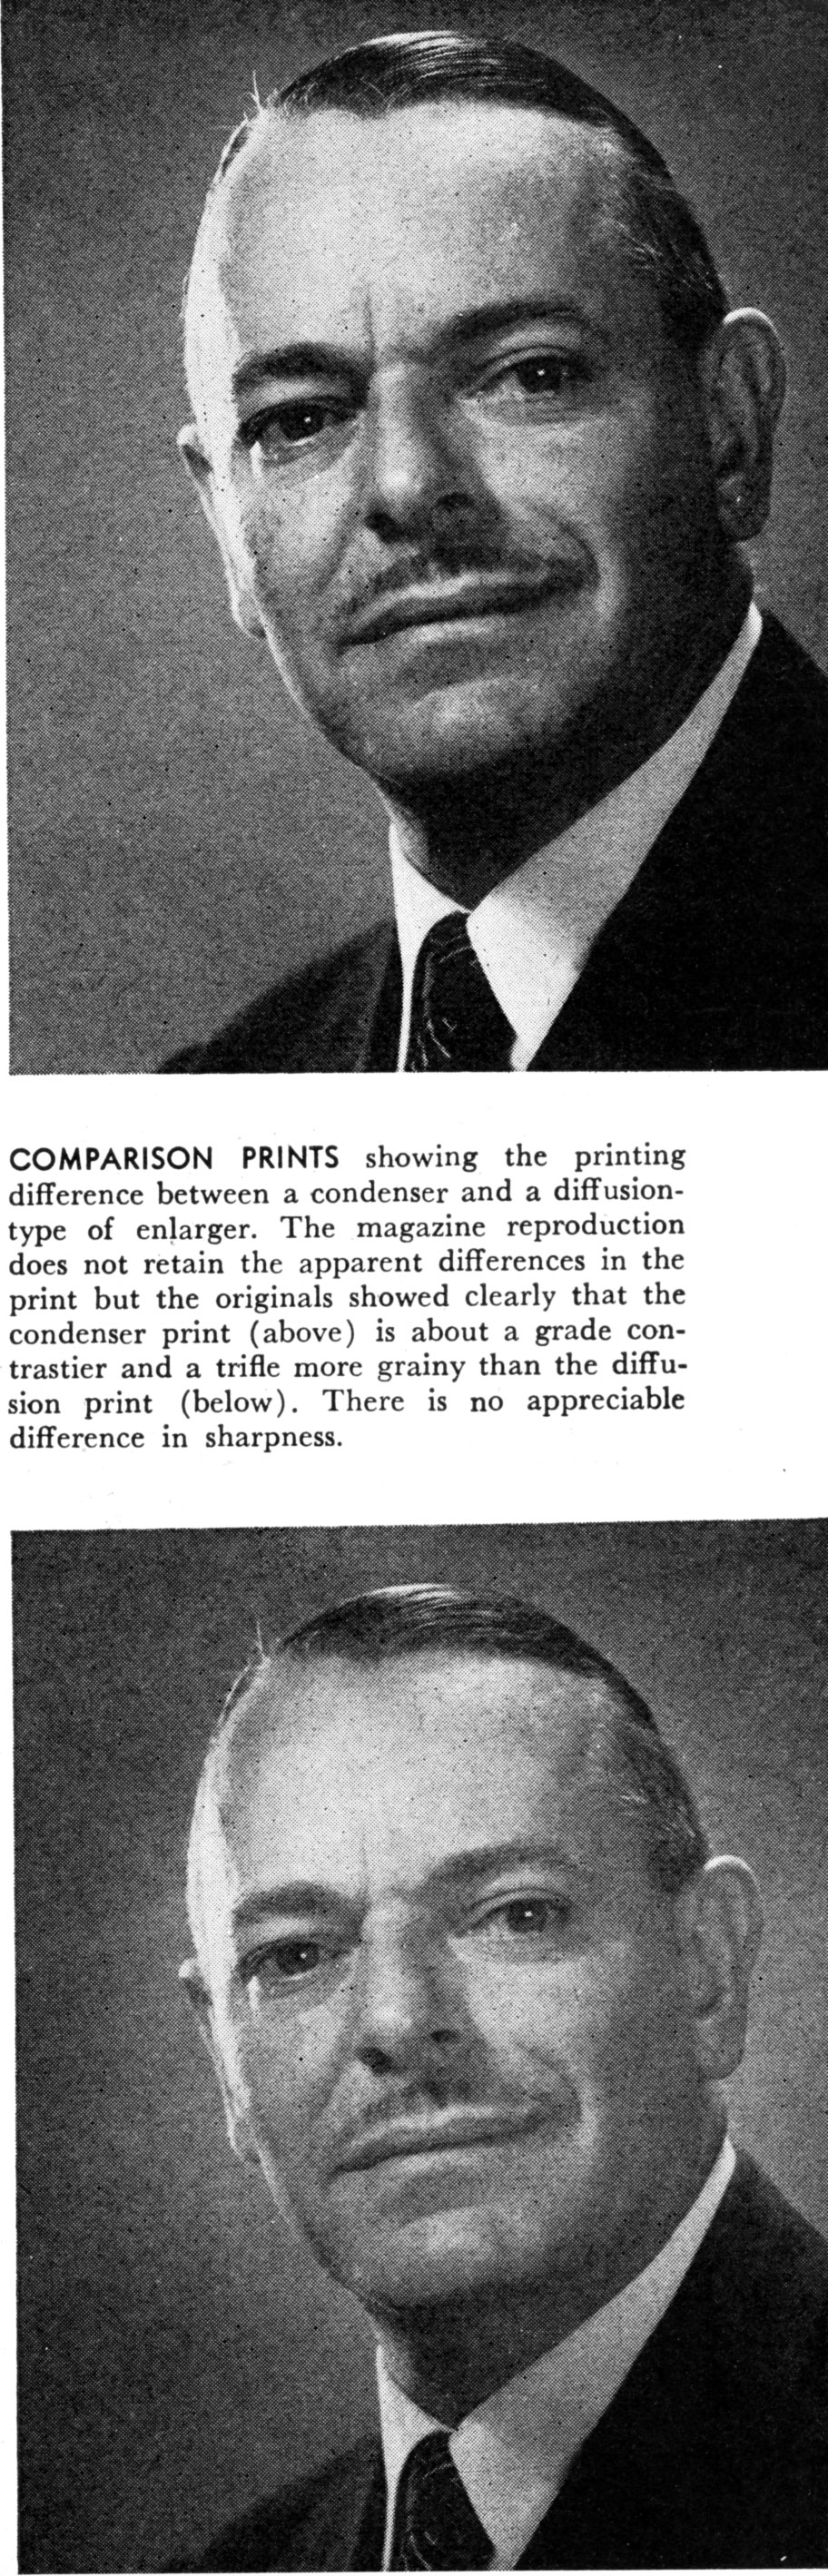
The Difference In Results
Actually, what is the practical difference between these two types of illumination systems? Does a condenser enlarger give sharper prints than a diffuser en-larger, other factors being equal ? The exponents of condenser enlarger sometimes make this rather broad assertion. Actually there is very little real difference in sharpness between the two types. The main difference is one of contrast, condenser systems giving roughly one grade of paper harder results than diffusion systems. The amount of contrast difference cannot be stated exactly since this varies slightly from one enlarger to another as well as with negatives of different density. Increased contrast often gives an apparent increase in sharpness, which largely accounts for the sharpness myth of condenser-made prints.
This difference in contrast is due to the scattering effect of light by the grains of silver in the negative, particularly from the more dense portions. The scattered light is deflected by the dense shadow areas into the less dense highlight areas, diluting them, as it were, with stray light. The amount of this scattering is negligible with the condensing system; with the diffusing system it is considerable.
The difference in illumination systems has other minor effects. Dust, dirt, scratches or similar defects in a negative are more apparent when printed in a condenser enlarger. Also, the appearance of grain is slightly more noticeable. Because of the condenser system's increased contrast, however, negatives to be used in a condenser enlarger can be developed to a slightly lower gamma. Reduced gamma or negative contrast, in turn, is a help in keeping grain size to a minimum.
A number of enlargers on the market which are particularly adapted to amateur use combine diffusion plates with condensers. There are a number of variations in the design of combination diffusion-condenser enlargers. Some feature regular glass diffusion plates in addition to the condensers, others make use of opal diffused projection bulbs, and still others have the top surface of the upper condenser ground to provide a diffusing effect. Best results with combination enlargers are obtained when negatives of normal contrast are used. In other words, negatives to be used in diffusion-condenser enlargers should be of scenes having a normal range of contrasts, and the negative should receive normal exposure and development.
Cold Light Enlargers
A third approach to even illumination over the entire negative area is the use of a coiled glass tubing containing Mercury vapor that fluoresces with a "cold" illumination of from 3100K to 6500K depending upon the type of unit specified. The spiral construction of the tubing eliminates the necessity of condensing lenses but a sheet of diffusing glass is needed to even out the illumination sufficiently. The glass, therefore, classifies this type of an enlarger as a diffusion enlarger.
Cold-light illumination, being comparatively bluish, is effective on enlarging papers which are primarily and inherently blue sensitive.
The advantages of the cold light enlargers are their increased printing speed for black-and-white work, and the absence of heat produced by the illuminant. This latter feature means that no matter how long a negative might be exposed, there would be no heat to cause it to buckle or blister. It also means that no heat resisting glass is needed to protect gelatine filter-foils used in color printing.
For color work, "heatless" illumination aids in making color-separation negatives because the register of the individual negatives might be effected by a color transparency that was being constantly expanded in a warm enlarger lamp house. The color temperature, however, is somewhat higher than the 3000K for which Ansco Printon is balanced. This means that the color compensating filters recommended on the Printon package probably would not produce a correct color balance on the first attempt with the "cold" light source, and some degree of filter adjustment would have to be made.
The Enlarging Lens
 Some enlargers come already equipped with lenses; the more expensive models do not. The problem here is simple; if you are a serious worker, buy the best lens you can afford. As we mentioned before, there is no point is owning an expensive camera with a lens that is the ultimate in sharpness if negatives are to be enlarged with a lens that gives inferior results.
Some photographers hope to save money by using their camera lens on an enlarger. Sometimes this practice will produce satisfactory results; sometimes it will not. What many photographers fail to realize is this: Camera lenses have been designed to give maximum sharpness at normal working distances which are more than about seven or eight times the focal length of the lens. When used at closer distances, say about four times the focal length, as is necessary in enlarging, the fine balance of the aberrations may be altered and the lenses may not give critically sharp images. The closer the working distance, the more the definition is apt to fall off. For small diameter enlargements, the lack of sharpness may be quite serious. Lenses, therefore, have been designed to be used solely for copying and enlarging purposes in order to achieve the best possible result.
Particularly for use in color work such as making separation negatives or Printon color prints, the enlarging lens should be corrected for chromatic aberrations. If the lens is not color corrected, defects which may result are, respectively, different size separation images, and color fringes in the final color print.
How About Coated Lenses?
Should the enlarging lens be coated? This is definitely not as important as having a coated camera lens and for black-and-white work does not make much difference in the results. Direct color prints made with coated lenses may be a trifle more crisp to the critical observer, but whether the extra cost of coating is worth while is really a minor matter of personal preference.
A helpful (but not essential) feature of some enlarger lenses is a clicking arrangement by which individual diaphragm stops can be counted when working in darkroom illumination.
Other points to check when buying an enlarger are as follows:
- Is the enlarger steady? There are two kinds of enlarger vibration, called "unit" vibration and "inherent" vibration. Inherent vibration is particularly bad because while the baseboard or column remain constant, the lamphouse tries to jitterbug. "Unit" vibration is an overall vibration from baseboard to lamphousing and is present to a certain extent in practically all en-largers. One way to overcome it is to clamp or screw the enlarger base to a solid support.
- Does the lamp house have an efficient cooling system? Overheated negatives may buckle, or even blister. In addition, excessive heat can ruin the register of separation negatives or harm gelatine color-compensating filters that have been inserted into the optical system for color printing.
- Does the enlarger's design permit large prints to be made? If the maximum height from the lamp-house to the easel is not sufficient to make a huge enlargement, is there some provision for projecting down onto the floor or horizontally against a wall?
- Can reductions be made? A reduction is any print smaller than the negative size as, for example, a portrait miniature or a print for a ring or locket. To make reduced prints, the enlarger must either have a long bellows draw or an accessory extension tube.
- What type of negative carrier do you prefer? In recent years there has been a tendency away from the glass-type negative carrier to the glassless variety because using two sheets of glass to hold the negative flat means four extra surfaces on which dust can collect. In addition, glass pressing on the shiny reverse side of the negative may cause annoying Newton's Rings which show up in the enlargement.
- Are all the parts easily accessible for cleaning? In the course of time, dust cannot help but accumulate on the lens, negative carrier, lamp house reflector and condensing lenses and so every wise photographer cleans his equipment periodically. Condensing lenses in particular must be kept free of dust since, if present, outlines of each dust speck may be incorporated into the print just as though the dust were on the negative.
- What are the available accessories? Inexpensive enlargers have none; more elaborate models have filter holders, copying attachments, inter-changable lamphouses, different types and sizes of negative carriers, and some even can double as a camera. A few models incorporate automatic focusing.
- Does the enlarger have perspective controls? Tilting negative carriers and swinging lens mounts are (sometimes) very helpful in straightening out converging or diverging lines caused by taking pictures with the camera back tilted out of a vertical position. If the enlarging easel has to be tilted upward considerably, to correct perspective faults in the negative the tilting negative carrier must be used to make certain the print will be uniformly in focus.
A final word of caution: When at last you have decided which enlarger best fits your particular needs and you have it home ready to remove it from its shipping case, carefully follow the manufacturer's instructions for assembling it. Do not force the parts together; the machined parts are probably built to close tolerances and will not stand abuse. Modern enlargers are fine optical instruments which with the proper care and use should provide many years of satisfactory performance.