The following is an article which originally appeared in Minicam Photography magazine, April 1941, pp 22-24. It was written and illustrated by Don J. Mohler.
This deals with flash-bulb photography and is obsolete, but some of it is still dead-on accurate and applicable to electronic flash. It's also fun as a how-far-we've-come look backward (cardboard reflectors? I never knew).
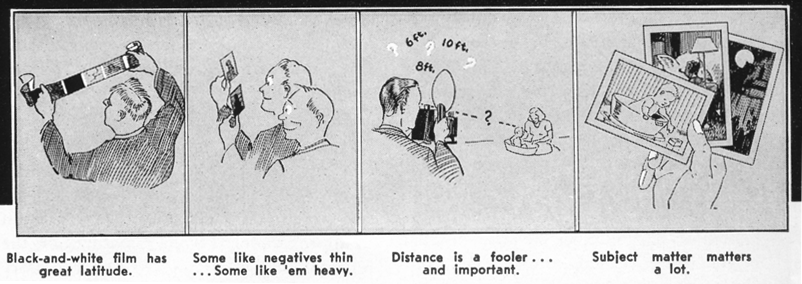
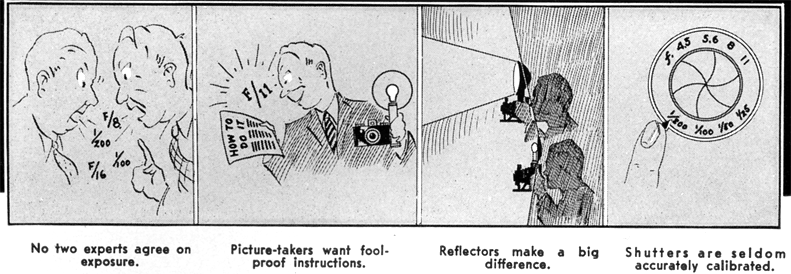
Even if you don't bother with the article, I recommend it for the illustrations at the top.
Are Exposure Tables Crazy?
For color as well as black-and-white flash shots, responsible manufacturers issue recommendations differing as much as 400%! Why?


In a letter asking for information about flash photography, a Minicam reader demanded, "Are Exposure Tables Crazy?"
He wanted to take some Kodachrome color shots using flash bulbs to get brilliant, sparkling illumination.
The first thing he learned was that in color photography it is important to get exposures exactly right. The second thing—to his dismay—that there are many discrepancies and seeming inconsistencies in the exposure recommendations from various sources.
In one case, one manufacturer recommends four times as much exposure as another. For example, the instruction leaflet packed with Kodachrome roll film advises use of ƒ/8 at 6 feet for Kodachrome "A" using one No. 11A Photoflash lamp. This is for open-shut exposure . . . opening the shutter, flashing the lamp, closing the shutter. Eastman ought to know the correct exposure. They make the film and run exposure tests.
But the table printed by the General Electric Company for the same conditions recommends ƒ/16 . . . a difference of two full stops. G-E ought to know the correct exposure. They make the lamp and run exposure tests.
Close reading of these two data sheets will reveal that Eastman's table is based on the use of "handy" reflectors of the two-for-twenty-cents cardboard kind. The G-E table is based on the use of "good" metal reflectors. A good metal reflector will put about four times as much light on the subject as a cardboard one, when identical lamps are used. There is your difference.
Many other seeming contradictions and variables exist. All shutters do not give identical exposures when set for the same speed. All synchronizers do not take identically the same part of the flash. There are slight differences between films of the same speed rating, and between individual flash lamps of the same make.
And there are great differences in individuals, too. One chronically overestimates the distance between his subject and his lamp. Another measures it carefully. Another underestimates the distance. Some estimate it correctly indoors, but go way off when estimating distances outdoors, especially at night. Some develop their negatives carefully in fresh solutions. Others are haphazard about development and run developing solutions nearly to the point of complete exhaustion.
These small differences in equipment, in individual methods, and in subject matter, can add up to big differences in a resulting negative and print.
Dark subject matter requires more exposure than medium or light subject matter . . . yet few but the experts consider and allow for this when making a flash picture.
And finally, there is little agreement among photographers as to exactly what is a good negative. Some like 'em thin for projection printing, some like 'em heavy for contact printing . . . some like 'em in between.
What can the individual do about it? How can he get good, consistent picture results that are better-than-average? He can reduce all of his personal differences to the least possible number, and he also can run a simple test to provide a basis for exact results.
Such a test is especially valuable in color photography where an inaccurately-calibrated camera shutter is enough to throw transparencies off color.
Make a series of pictures using one camera, synchronizer, reflector, film, and flash bulb. The recommendation of the photo dealer or manufacturer, can be followed in selecting the combination of equipment best suited to your purpose. Having decided, you will stick with these . . . retaining even the same shutter speed. The test shots should be made under good average conditions . . . that is, in a normal-sized living room, with medium colored walls and ceiling. The subject should be a person in medium-colored clothing (subject matter of which pictures are wanted anyway, can be used. Some of the shots will give good prints). The subject should be in the same position in all pictures . . . the camera should be in the same place . . . the lamp-to-subject distance should remain the same.
The Lamp-To-Subject distance may be determined from any exposure table. Pick a distance which calls for a diaphragm opening half-way between wide open and fully stopped down. Then make a series of consecutive exposures . . . starting with the smallest stop opening, and making one picture at each opening. With Kodachrome, make these exposures at ½stop intervals, such as ƒ/5.6, ƒ/6.3, ƒ/8, etc. For B&W pictures, expose at 2-stop intervals, such as ƒ/4, ƒ/8, ƒ/16, etc. Now, the lamp-to-subject distance, multiplied by the diaphragm opening, will give you a guide number which can be used to remember exposure and get the same results under similar conditions. Suppose, for example, that your best negative resulted from a stop opening of ƒ/16 at 10 feet: 16 times 10 equals 160, your Flash Number.
Dividing this number by any distance in feet will give the correct diaphragm opening for your particular camera, reflector and room conditions. At 20 feet, for example, dividing 160 by 20 gives 8 . . . use ƒ/8. Or the number divided by a preselected stop opening gives the correct lamp-to-subject distance. For ƒ/ll ... 160 divided by 11 equals 14.5 . . . use a distance of 14½ feet.
In B&W photography, the latitude of the film is perfectly adequate to take care of slight variations in conditions. In color work, where absolutely perfect exposure is desired, it is easy to adjust for these slight variations.
Most flash pictures are made with the synchronizer and flash bulb reflector fastened right to the camera. This means that the lamp-to-subject distance and the camera-to-subject distance are the same. The lamp-to-subject distance is then often determined by what the picture taker wants to include in the scene. He may have to back up to thirty feet to get it all in. Or, he may come in as close as four feet to get a big image. To allow for this variable, one good procedure is to frame the subject as desired in the view finder and then focus.
When the focus is sharp, take the camera down from the eye and read off the distance on the focusing scale (or if there is no provision for visual focusing on the camera and maximum quality is desired in the results, make a flexible steel tape a part of your camera equipment and measure the distance in feet between the camera and the subject carefully.) Dividing this determined distance into the guide number will then give the "ƒ" stop opening.
At near distances, the indicated stop opening may be smaller than any available on the camera. Putting a handkerchief over the reflector and opening up two stops more than indicated will result in approximately correct exposure; or, the reflector may be connected to the battery case by means of an extension cord which will allow the lamp to be moved independently of the camera so that a suitable lamp-to-subject distance may be selected regardless of camera-to-subject distance.
On far shots, if the division of the guide number by the lamp-to-subject distance results in an indicated diaphragm opening larger than any available on the camera, the only recourse is to move in to a distance which will give correct exposure with the largest diaphragm opening, use the lamp separately on an extension cord so that it may be moved forward independently of the camera, or select a slower shutter speed which will allow more light from the flash bulb to get through to the film (there is no gain in going below l/50th of a second).
When you must guess, as every photographer must now and then, your best bet is to make the adjustment in favor of over-exposure rather than under exposure. You will get the picture. But get enough confidence in your calculations to keep you from the chalk-and-soot effect of those who chronically overexpose and overdevelop to play safe. You can do it with your own individual guide number. Then you can disagree with everyone else. You will be an expert as far as your own equipment goes.